1. Install and launch
Follow the Installation instructions for your platform, then launch Maestro.2. Create an agent
Maestro supports Claude Code, Codex (OpenAI), OpenCode, and Factory Droid as providers. Make sure at least one is installed and authenticated.Maestro is a pass-through to your provider. Your MCP tools, custom skills, permissions, and authentication all work in Maestro exactly as they do when running the provider directly. The only difference is batch mode execution - Maestro sends a prompt and receives a response rather than running an interactive session.
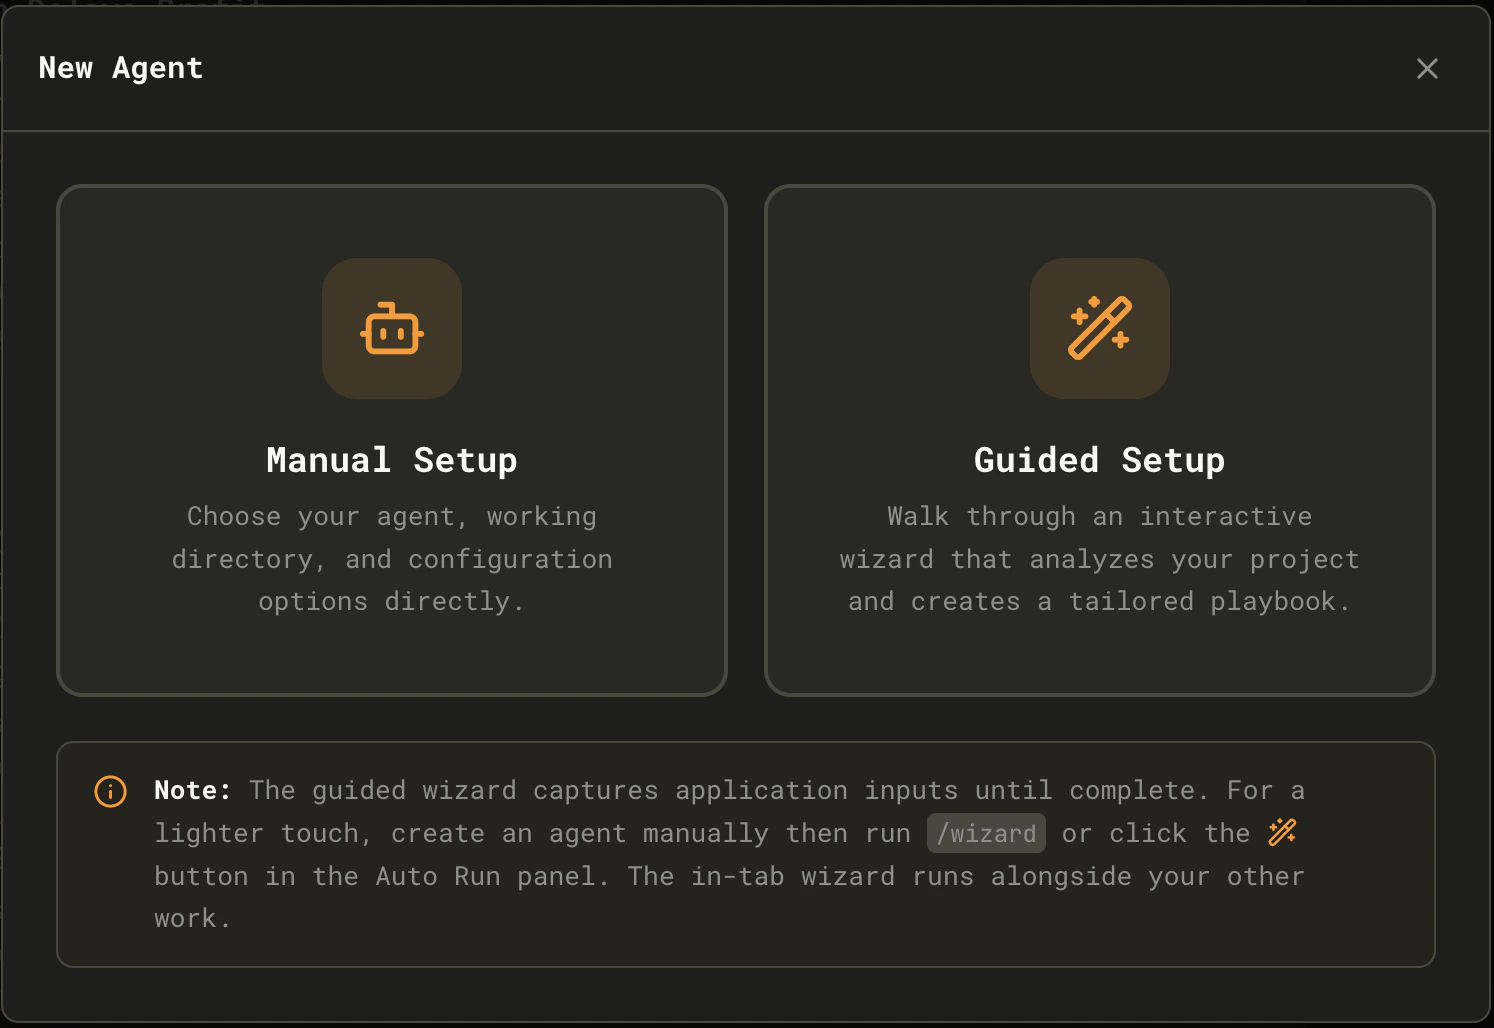
Cmd+N / Ctrl+N). You’ll see the New Agent selector:
- Selecting an AI provider
- Choosing your project directory
- Having a discovery conversation where the AI learns about your project
- Generating an initial Auto Run Playbook with tasks
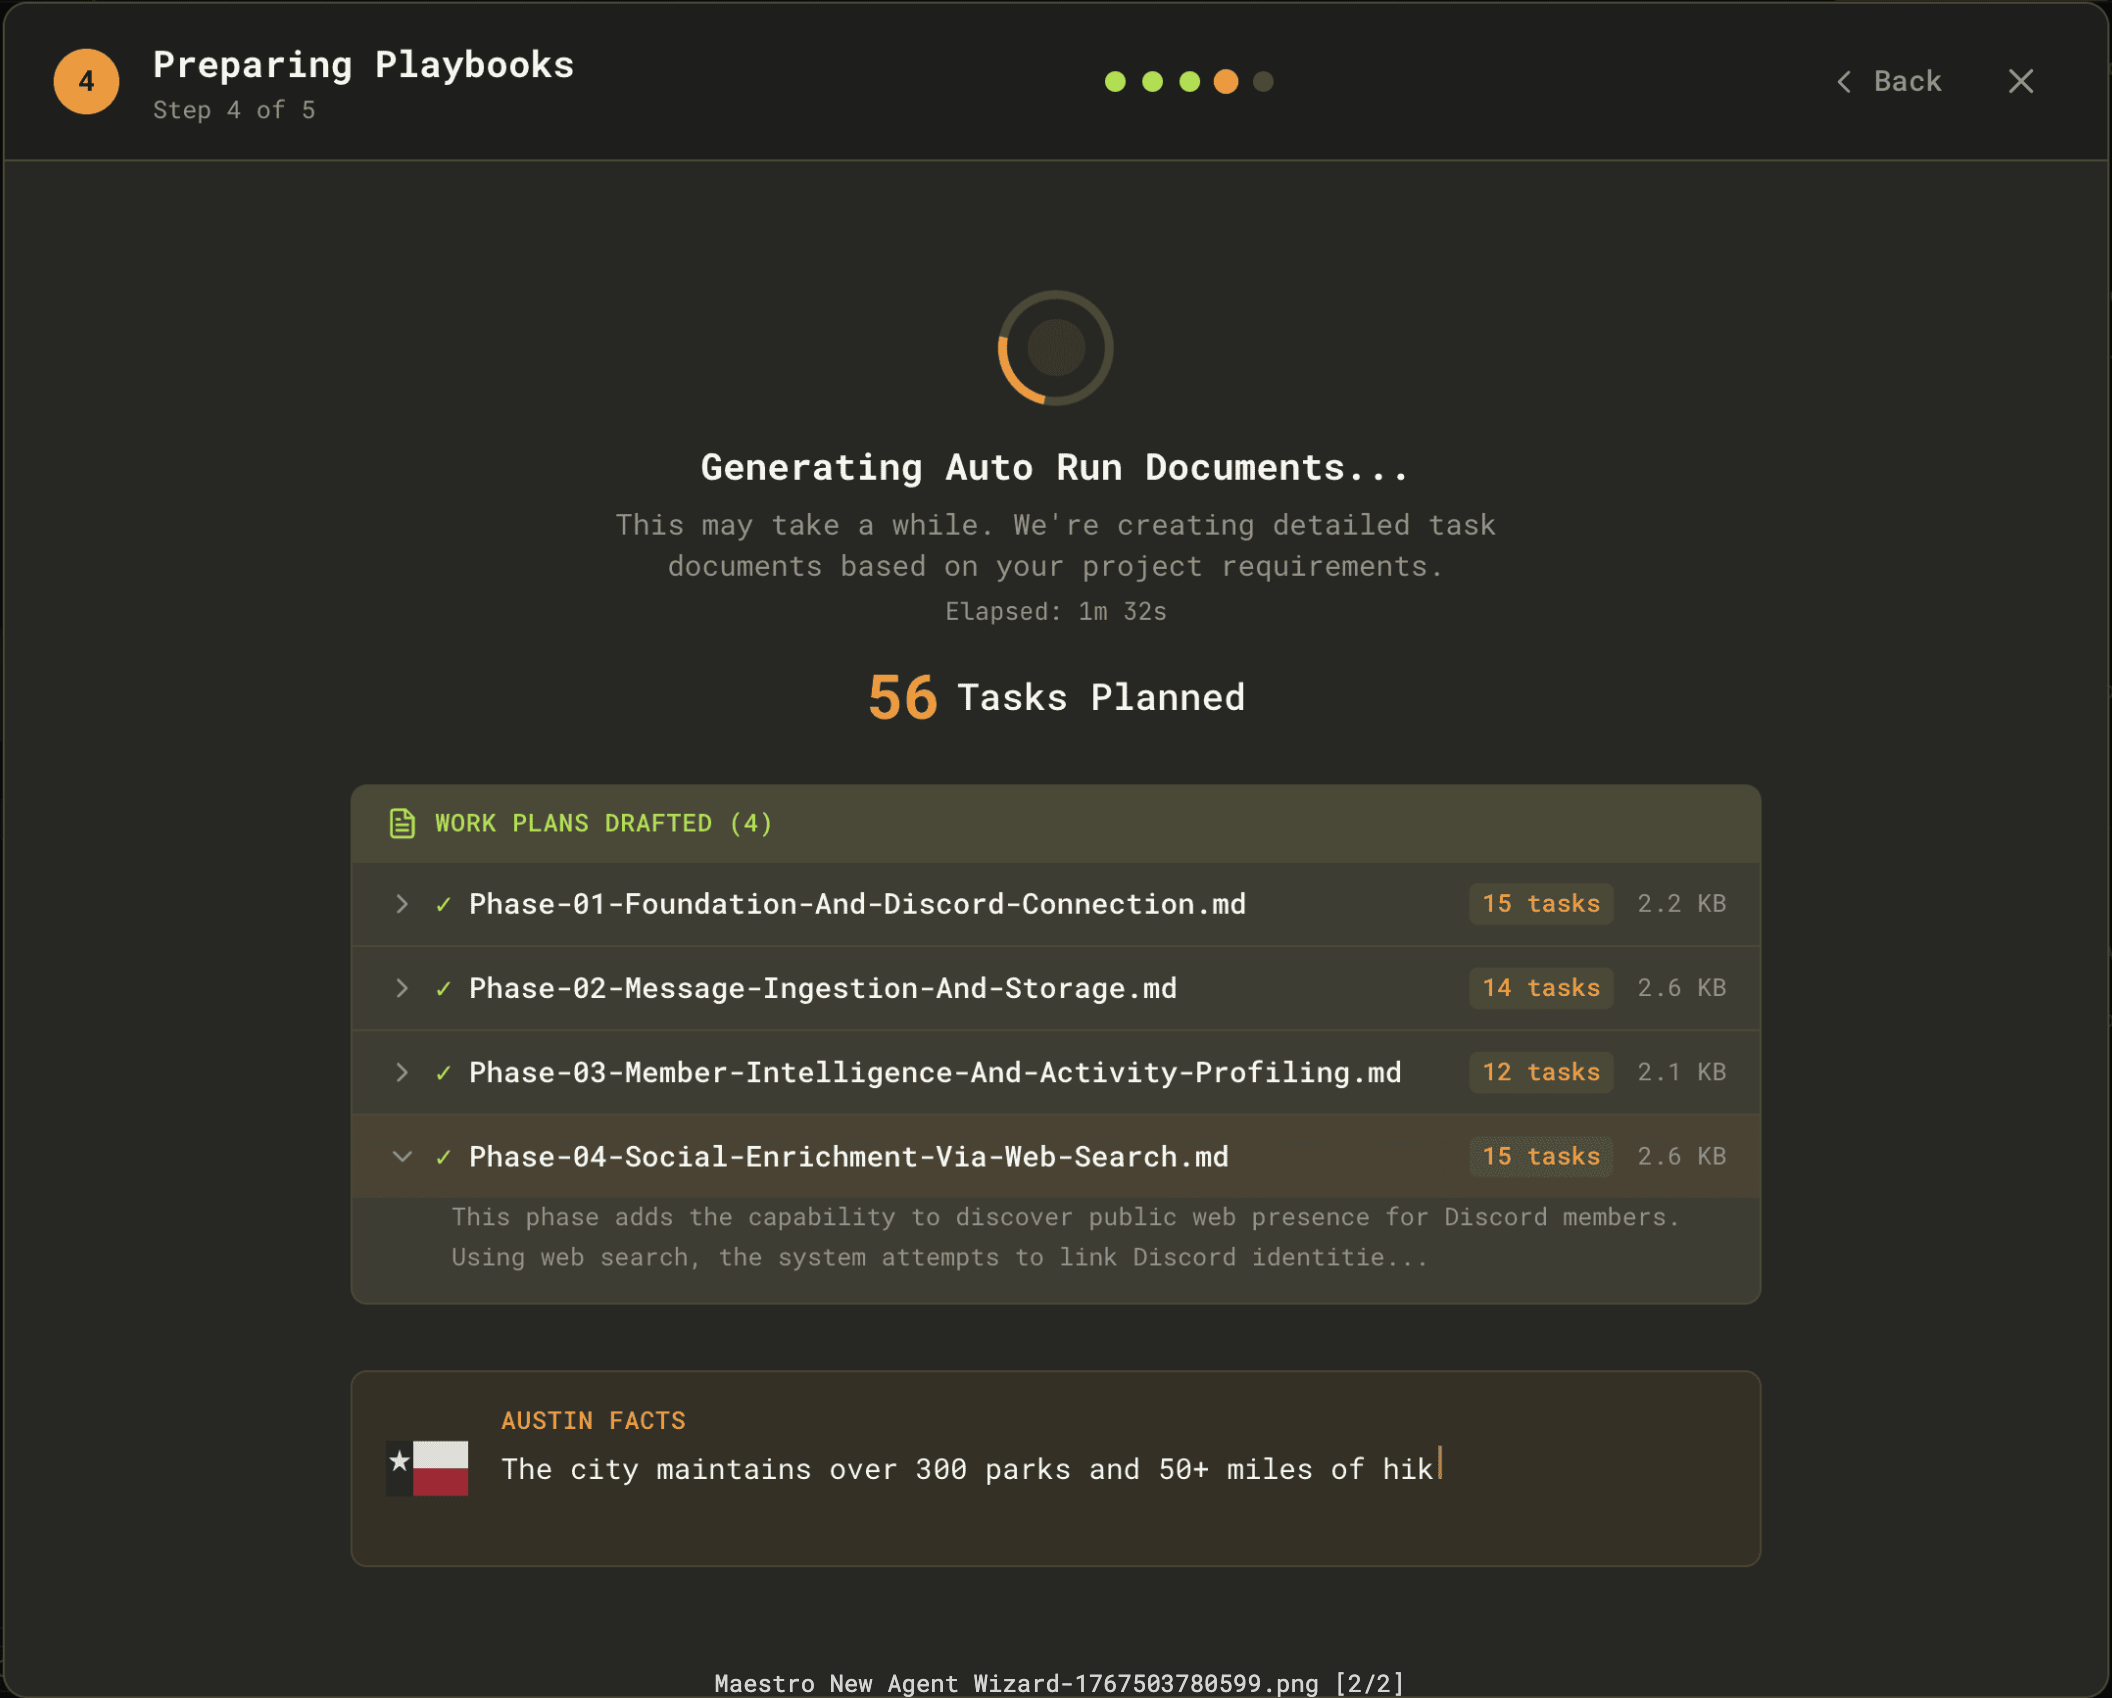
Initiation/ subfolder within .maestro/playbooks/ to keep them organized separately from documents you create later.
The guided wizard captures application input until it completes. For a lighter touch, create an agent manually, then run the
/wizard slash command or click the wand button in the Auto Run panel. The in-tab wizard runs alongside your other work.Introductory Tour
After completing the Wizard, you’ll be offered an Introductory Tour that highlights key UI elements:- The AI Terminal and how to interact with it
- The Auto Run panel and how document processing works
- File Explorer and preview features
- Keyboard shortcuts for power users
Cmd+K / Ctrl+K) → “Start Tour”.
3. Open a project
Point your new agent at a project directory. Maestro will detect git repos automatically and enable git-aware features like diffs, logs, and worktrees.4. Start a conversation
Use the AI Terminal to talk with your AI provider, and the Command Terminal for shell commands. Toggle between them withCmd+J / Ctrl+J. Each tab in the AI Terminal is a separate session.