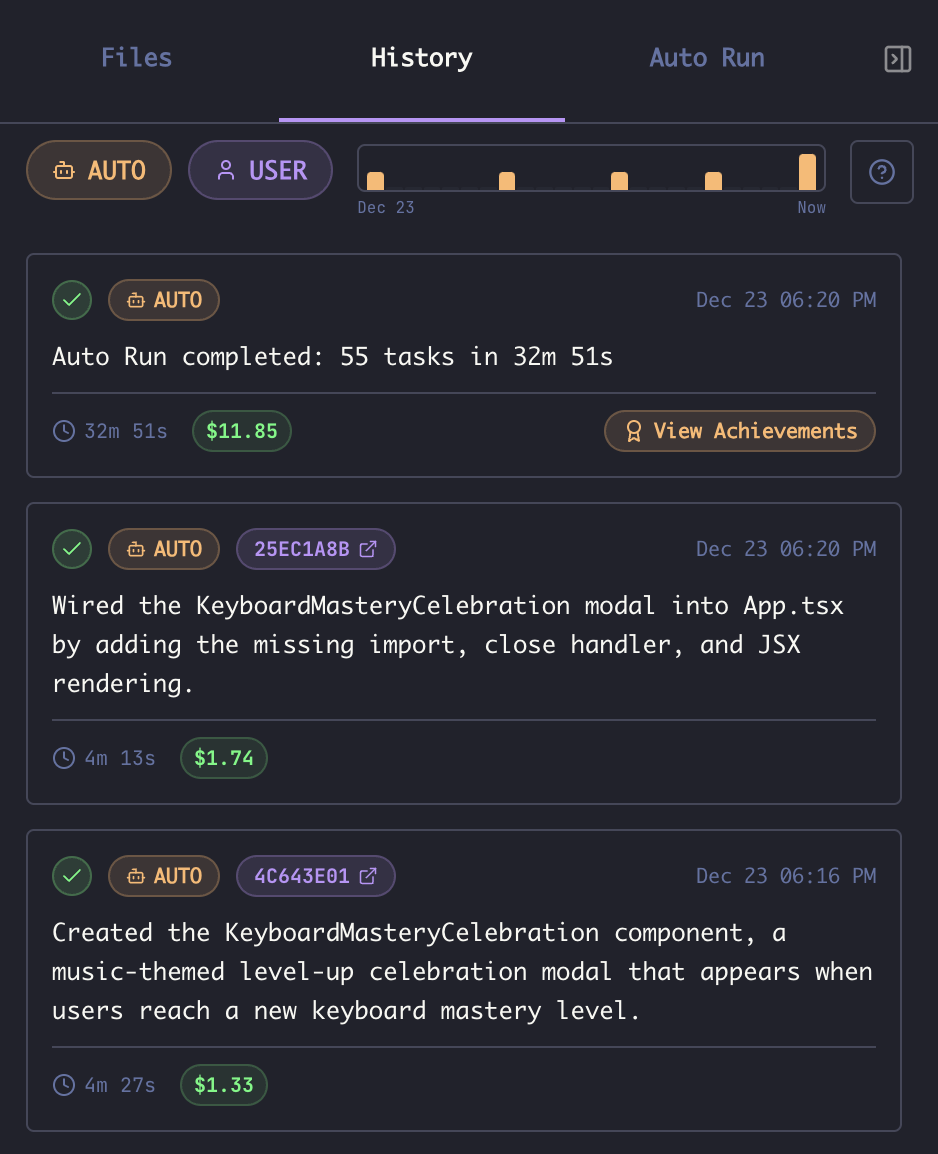
Entry Types
History entries are categorized by source:| Type | Label | Description |
|---|---|---|
| AUTO | 🤖 AUTO | Entries created by Auto Run task completions |
| USER | 👤 USER | Entries created manually by the user |
Auto Entries
Auto entries are created automatically when Auto Run completes a task. Each entry includes:- Summary of what the agent accomplished
- Session ID (clickable to jump to that conversation)
- Duration and cost of the task
- Timestamp of completion
User Entries
User entries are created in three ways:- History Toggle - Enable the History pill in the AI input box. Each completed prompt-response cycle that did real work creates a user history entry. Turns that only exchanged text (a plain question answered with prose, no tool use) are skipped, so asking a quick question never clutters your history.
-
/historyCommand - Run/historyto create a synopsis entry covering all activity since the last time you ran the command. This is useful for periodic summaries without logging every single interaction. -
/clearCommand - Running/clearautomatically creates a history entry before clearing the conversation, preserving a synopsis of your work.
Synopsis Debounce
Each history entry is generated by a short follow-up run that asks the agent to summarize its work, so a burst of quick completions can produce a burst of synopses. Synopsis Debounce (Settings → General, shown beneath the History toggle when it is on) waits for the agent to be idle for a chosen interval before generating the synopsis. Rapid back-to-back completions within the window are coalesced into a single entry covering everything since the last synopsis, so a fast-moving conversation settles into one clean summary instead of many fragments. Set it to Off to generate a synopsis immediately after every completion (the default), or pick 15s, 30s, 1 min, or 2 min to coalesce. Regardless of this setting, turns that did no real work are never synopsized.Filtering History
By Type
Use the AUTO and USER filter buttons at the top of the History panel to show or hide each entry type:- Click AUTO to toggle Auto Run entries
- Click USER to toggle user-created entries
- Both can be active simultaneously
By Keyword
PressCmd+F / Ctrl+F to open the search box, or click in the filter area to type. The search matches against:
- Entry summaries
- Session names and IDs
- Full response content
By Time Range
The Graph View at the top shows activity distribution over time. Right-click the graph to change the time range:- 24 hours
- 72 hours
- 1 week
- 2 weeks
- 1 month
- 6 months
- 1 year
- All time
Entry Details
Click any history entry to open the Detail View: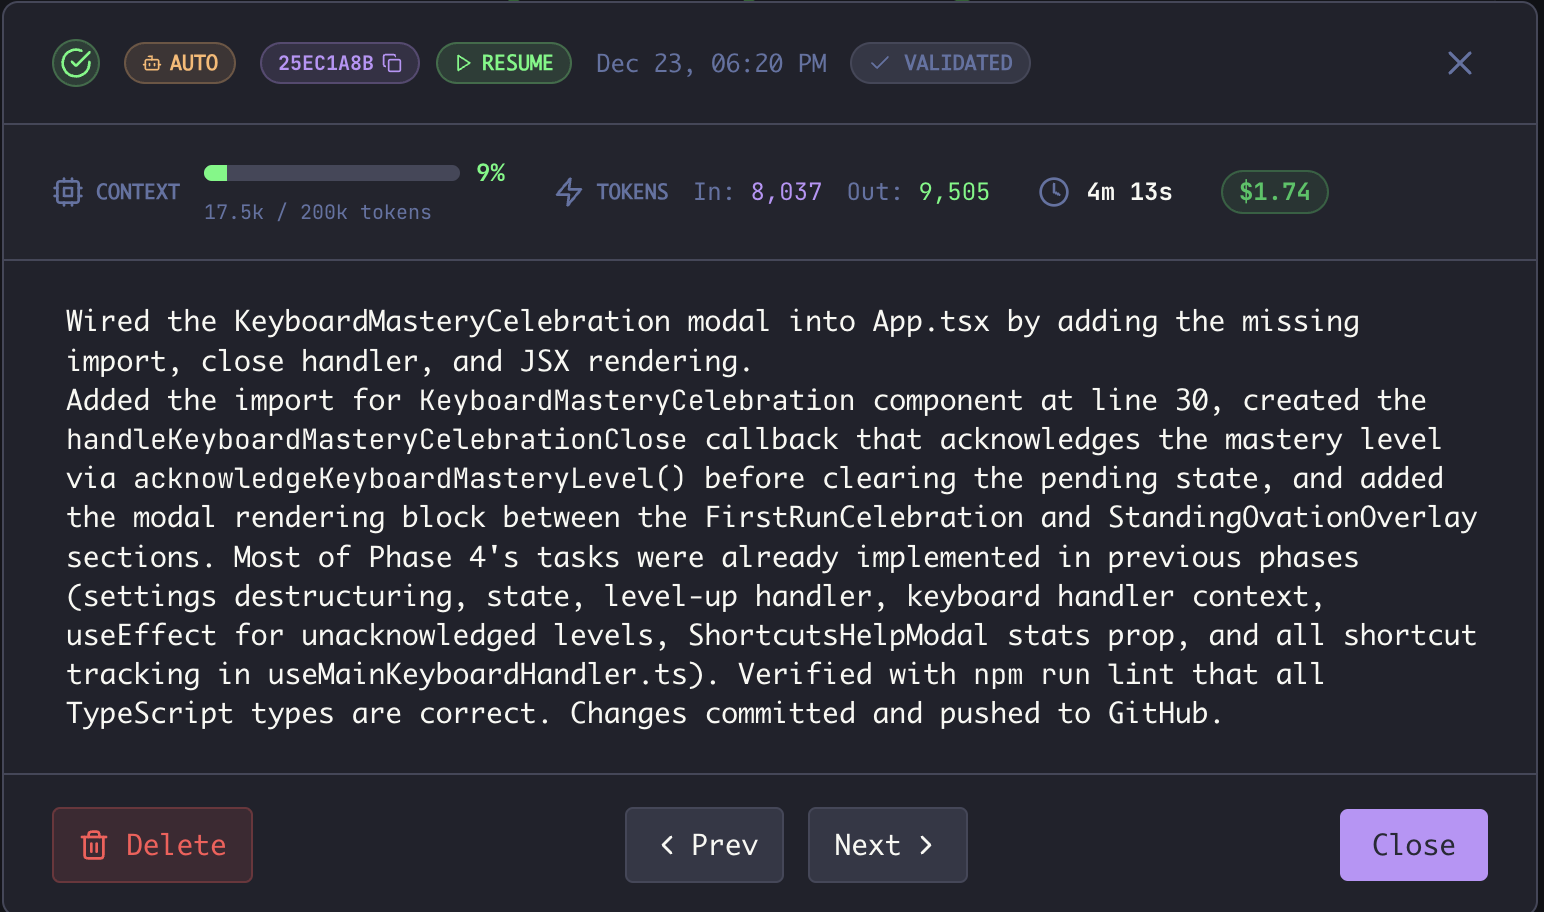
- Full entry header with type badge, session ID, timestamp, and validation status
- Context usage - tokens consumed and context window percentage
- Token breakdown - input tokens, output tokens
- Duration and cost
- Full summary text of what was accomplished
- RESUME button - Jump directly to the AI session to continue from where Maestro left off
Navigation
- Prev / Next buttons to navigate between entries (or use
←/→arrow keys) - Close button to return to the list view
- Delete button to remove the entry (with confirmation dialog)
Validating Entries
The Validated flag helps you track which Auto Run tasks have been human-reviewed.
- Open the entry detail view
- Click the VALIDATED toggle in the header
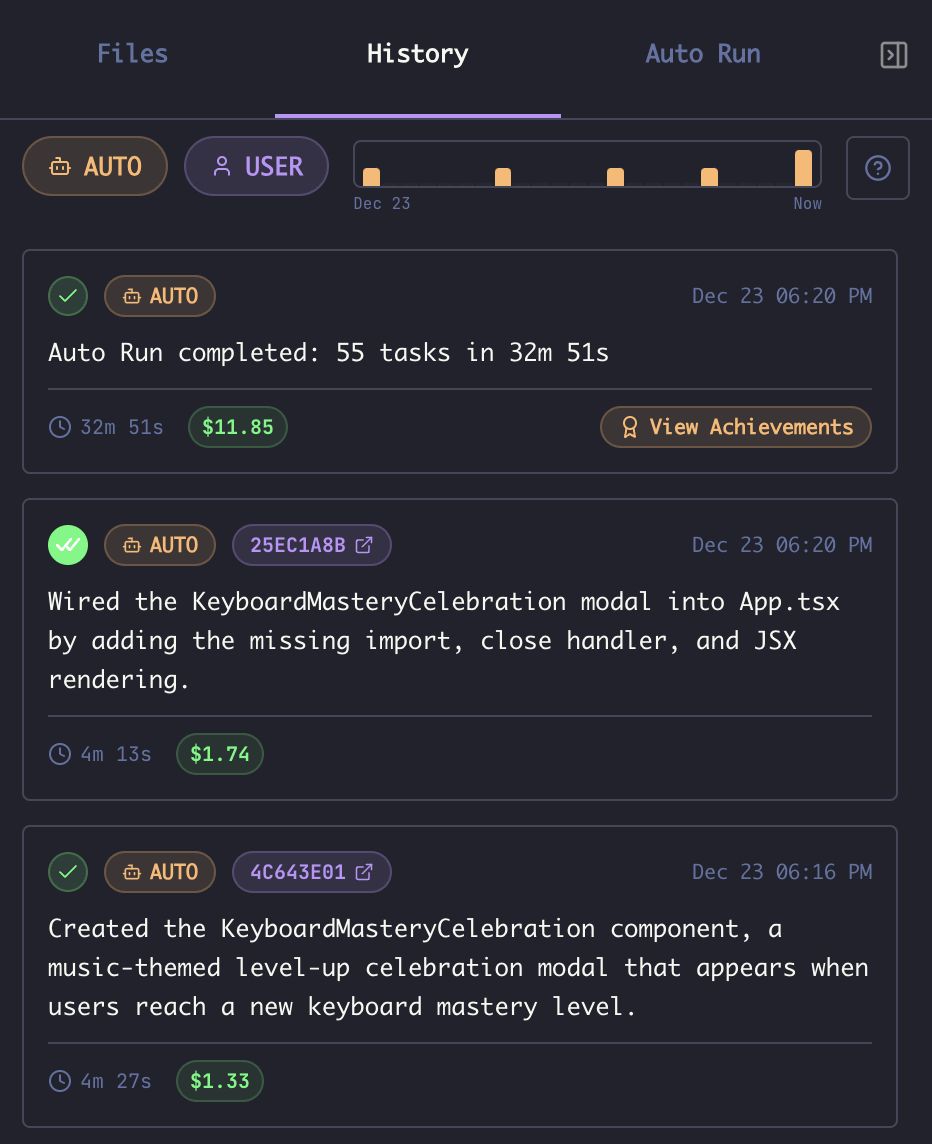
- Open the first AUTO entry
- Click RESUME to jump to the session and verify the work
- If satisfied, toggle VALIDATED
- Click Next to review the next entry
- Repeat until all entries are validated
Resuming Sessions
Every history entry with a Session ID has a RESUME button. Clicking it:- Opens the AI Terminal for that agent
- Loads the exact session where the work was done
- Positions you to continue the conversation
Keyboard Navigation
List View
| Key | Action |
|---|---|
↑ / ↓ | Navigate between entries |
Enter | Open detail view for selected entry |
Cmd+F / Ctrl+F | Open search filter |
Esc | Clear selection or close search |
Detail View
| Key | Action |
|---|---|
← / → | Navigate to previous/next entry |
Esc | Close detail view, return to list |
Cross-Host Shared History
When working with SSH Remote Execution, history entries can be synchronized across machines. Remote entries appear with a ☁ Remote pill and a hostname badge showing their origin. This enables:- Same user, multiple machines - see your work from any machine you use
- Team collaboration - see what teammates have done on a shared project
Storage
History is stored per-session in JSON files within thehistory/ subdirectory of your Maestro data folder:
- macOS:
~/Library/Application Support/maestro/history/<sessionId>.json - Windows:
%APPDATA%/maestro/history/<sessionId>.json - Linux:
~/.config/maestro/history/<sessionId>.json