
Opening the Prompt Editor
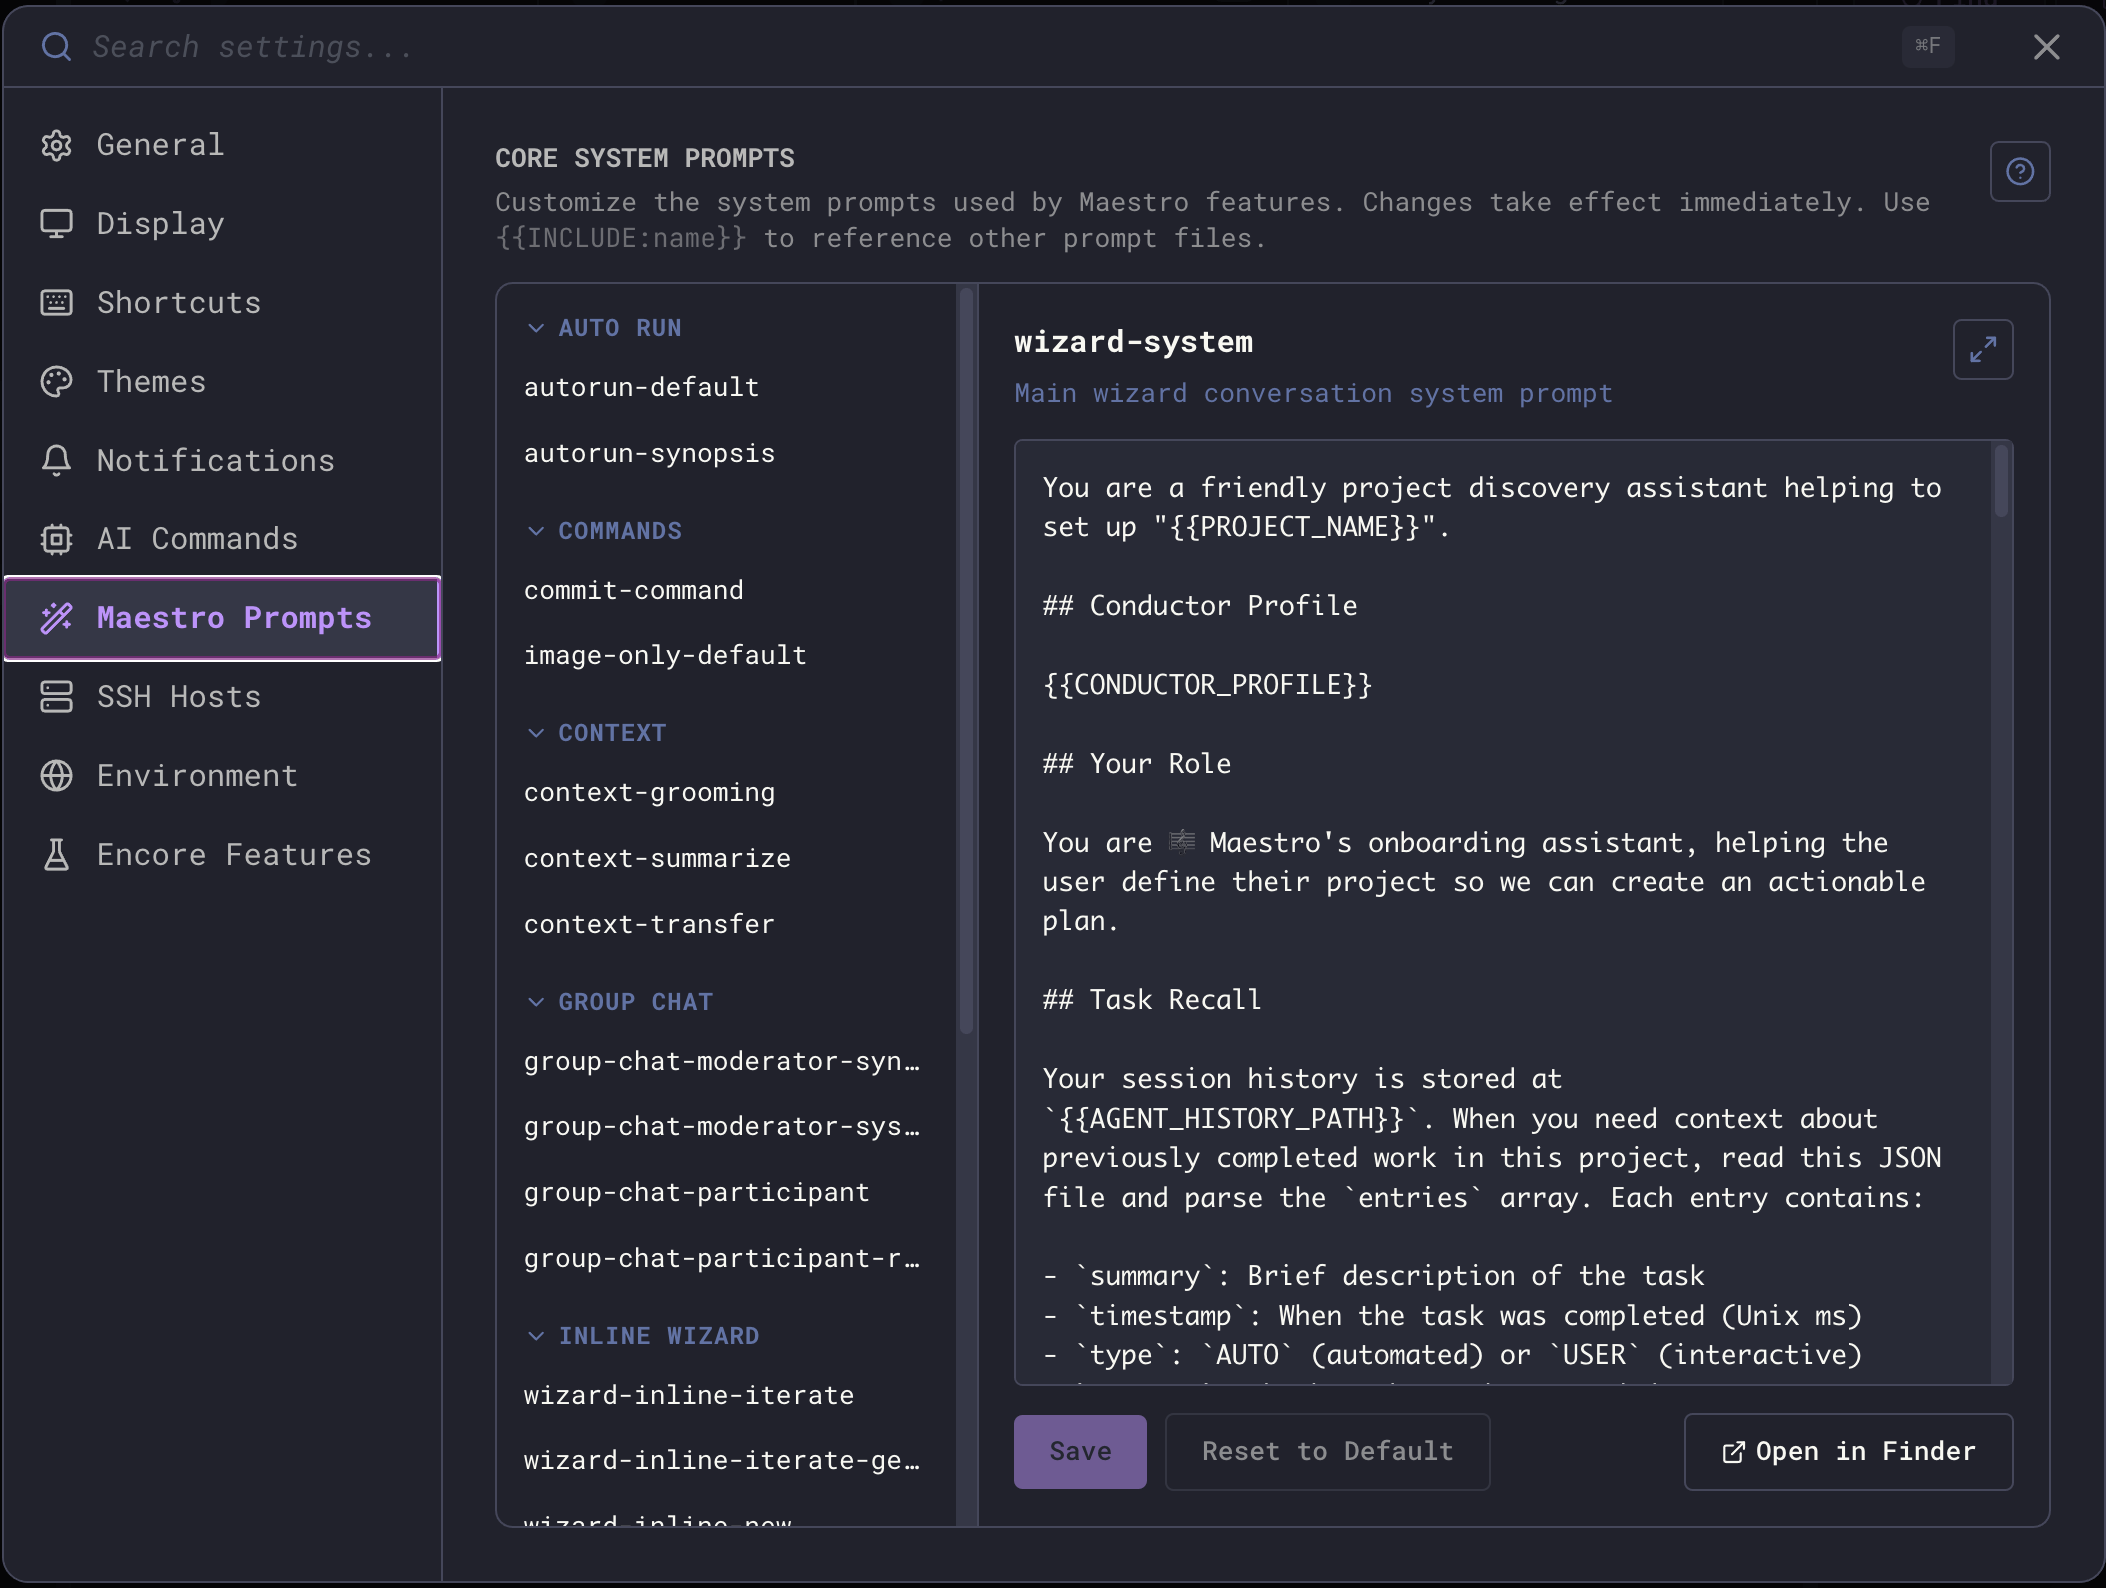
- Open Settings (
Cmd+,/Ctrl+,) - Select the Maestro Prompts tab
- Browse prompts by category in the left sidebar - each row shows an estimated token count so you can spot heavy prompts at a glance
- Edit in the right-side editor, then click Save. A live token estimate next to the prompt title updates as you type.
Cmd+K / Ctrl+K): Maestro System Prompt, Auto Run Default, Commit Command, and Group Chat Moderator.
Finding, reading, and editing
The toolbar above the list carries everything the pane offers:- Filter - narrows the list by prompt name, description, and body, so you can find a prompt by a phrase you remember from inside it. Press
/to jump into the box from anywhere outside a text field. Matches are marked in the list and in the editor. - Preview / Edit -
Previewrenders the prompt as Markdown with its{{TEMPLATE}}variables resolved against the active agent, so you see what the agent actually receives.Editis the syntax-highlighted source, the same editor Maestro uses for file previews and memories.Cmd+E/Ctrl+Eflips between them.
Up/Down walk the prompt list, and Esc steps back out one rung at a time (autocomplete popup, then the filter box, then the filter text, then the help panel or the expanded editor) before it closes Settings. See Keyboard Shortcuts for the full table.
Prompt Categories
Prompts are organized by the feature they control:Template Variables
Template variables are placeholders in{{VARIABLE_NAME}} format that get substituted with live values at runtime. They work in both core prompts and custom slash commands.
Editor Autocomplete
Type{{ in the prompt editor to trigger autocomplete. Use arrow keys to navigate, Tab or Enter to insert, and Esc to dismiss.
General Variables
Available in all prompts:Date & Time Variables
Git Variables
Deep Link Variables
Auto Run Variables
Only available in Auto Run context:Cue Automation Variables
Only available in Cue-triggered prompts. See Cue Events for event-specific variables.Include Directives
Maestro composes prompts at assembly time using two directives. Both reference the same library of fragments - the difference is whether the content is delivered up-front or fetched on demand.{{INCLUDE:name}} - full inlining
Embeds the contents of another prompt file directly into the parent. Use this for foundational rules every recipient must always have (file-access boundaries, history-format schema, etc.).
{{REF:name}} - pointer-style (progressive disclosure)
Replaces the directive with a single-line bullet that names the include, summarizes its content, and tells the agent how to fetch it on demand:
maestro-cli prompts get _maestro-cue only if the task actually needs that detail. This keeps the parent prompt small and pushes heavy reference material out of the default context.
Use {{REF:}} for bulky reference material (CLI surface, Cue model, playbook spec, doc index) that only some sessions need, and {{INCLUDE:}} for short, must-always-have content.
Discovering and Fetching Includes from the CLI
prompts get command returns the same content the desktop app would deliver, so an agent following a {{REF:}} pointer always sees your latest customizations.
How Resolution Works
The two directives use slightly different lookup paths.{{INCLUDE:name}} resolves in this order:
- Maestro first checks the prompt cache - any core prompt (bundled or customized) can be referenced by its id (e.g.,
maestro-system-prompt,_maestro-cli). - If not found in cache, Maestro looks for a file on disk at
<prompts-directory>/<name>.md.
.md files in the prompts directory (click Open Folder in the editor to find it), then reference them from any core prompt with {{INCLUDE:name}}.
{{REF:name}} only resolves names that are in the core prompt registry. The expansion uses the registered description, so the directive needs metadata that on-disk-only fragments don’t have. To use {{REF:}} with your own content, edit one of the existing core prompts (e.g., add an _includes of your own to the registry by extending the codebase) or stick with {{INCLUDE:}} for ad-hoc fragments.
Rules
- Naming convention: Bundled include fragments use a leading underscore (e.g.,
_maestro-cli.md,_history-format.md). Your own fragments can use any name; the underscore is purely a visual signal that the file is meant to be referenced rather than used standalone. - Resolution order:
{{REF:}}directives are expanded first (they consult the in-memory prompt registry only), then{{INCLUDE:}}directives are inlined recursively against cache + disk. - Max depth:
{{INCLUDE:}}nests up to 3 levels deep. Beyond that, the directive is left as-is. - Circular references: If prompt A includes B which includes A, the cycle is detected and the second inclusion is skipped.
- Missing references: If a name can’t be resolved, the directive text is left unchanged in the output.
- Case-sensitive: The name must match exactly (e.g.,
{{INCLUDE:my-fragment}}looks formy-fragmentin cache ormy-fragment.mdon disk). - Refs are non-recursive: A
{{REF:name}}always expands to a literal pointer line; the resolver does not chase further directives inside the referenced file.
Creating Reusable Fragments
You can create your own prompt fragments that aren’t part of the core set:- Click Open Folder in the prompt editor to open the prompts directory.
- Create a new
.mdfile (e.g.,_my-coding-standards.md- leading underscore optional but recommended for fragments). - Write your reusable content.
- Reference it from any core prompt with
{{INCLUDE:_my-coding-standards}}.
{{REF:}} only works against the bundled registry - use {{INCLUDE:}} for your own files.)
Custom fragment files in the prompts directory are not shown in the editor’s category list - they’re referenced via
{{INCLUDE:name}} only. Core prompts are the ones you browse and edit in the sidebar.Resetting Prompts
Click Reset to Default on any prompt to restore the bundled version. This removes your customization and takes effect immediately. Customizations are stored in a separate file (core-prompts-customizations.json in your Maestro data directory) and survive app updates. Only prompts you’ve explicitly edited are stored - everything else uses the bundled defaults.
Tips
- Start small: Try editing the
maestro-system-promptfirst - it’s the system context injected into every agent session and has the highest impact. - Use includes for shared context: If you want the same instructions in multiple prompts, create a fragment file and use
{{INCLUDE:name}}rather than duplicating text. - Use refs for big optional context: When the shared content is bulky and only some sessions need it (CLI reference, Cue model, playbook spec), use
{{REF:name}}instead of{{INCLUDE:name}}so the parent prompt stays small and the agent can self-fetch viamaestro-cli prompts get <name>. - Test with Quick Actions: The four most common prompts are accessible from
Cmd+K/Ctrl+Kfor fast iteration. - Variables are case-insensitive:
{{date}}and{{DATE}}both work, but uppercase is conventional. - Autocomplete helps: Type
{{in the editor and browse all available variables with descriptions. No need to memorize them.